brother printer mfc-j5330dw manual
The Brother MFC-J5330DW is a versatile all-in-one printer, offering comprehensive documentation for setup, operation, and troubleshooting – readily available online as a PDF manual.
Overview of the Printer
The Brother MFC-J5330DW is a high-performance, color inkjet all-in-one printer designed for home and small office use. This A3-capable device excels in printing, scanning, copying, and faxing functionalities. The comprehensive user manual, available for download, guides users through initial setup, network connectivity (wired & wireless), and detailed operational instructions.
It supports various paper types and sizes, offering duplex printing for efficient document handling. The manual also provides essential maintenance tips, troubleshooting steps, and information regarding genuine Brother supplies, ensuring optimal printer performance and longevity.
Key Features and Benefits
The MFC-J5330DW boasts several key features detailed in its user manual. These include high-quality color printing, fast print speeds, and convenient wireless connectivity. Benefits extend to mobile device printing via Brother iPrint&Scan, streamlining workflows.
The all-in-one functionality – print, scan, copy, and fax – enhances productivity. The manual emphasizes using genuine Brother supplies for optimal results and machine longevity. Access to open-source software details is also provided within the documentation.
Setting Up Your Printer
Initial setup involves unboxing, installing drivers and software, and connecting to your network – wired or wirelessly – as detailed in the manual.
Unboxing and Initial Setup
Carefully unpack your Brother MFC-J5330DW, ensuring all components are present. Remove all protective tape and packaging materials, both inside and outside the printer. The manual guides you through identifying each part. Initial setup requires connecting the power cord and loading paper into the trays. Follow the on-screen instructions displayed on the LCD panel to configure the initial settings, including language and date/time. Proper unboxing and following these steps ensures a smooth start with your new printer.
Installing Drivers and Software
To unlock the full potential of your MFC-J5330DW, install the necessary drivers and software. Download the latest versions from the official Brother website; links are often provided within the online manual. Run the downloaded installer and follow the on-screen prompts. The software suite, including Brother iPrint&Scan, enhances functionality. Ensure your computer meets the system requirements for optimal performance. Correct driver installation is crucial for seamless printing, scanning, and copying operations.
Connecting to a Network (Wired & Wireless)
The MFC-J5330DW offers both wired and wireless connectivity options. For a wired connection, use an Ethernet cable to connect the printer directly to your router. For wireless setup, access the printer’s network settings via the control panel and select your Wi-Fi network. Enter your password when prompted. Detailed instructions are available in the user manual, specifically for wireless users needing assistance with connection procedures.
Understanding the Control Panel
The MFC-J5330DW’s control panel features an LCD screen and buttons for navigating menus, adjusting settings, and monitoring printer status effectively.
LCD Screen Navigation
The Brother MFC-J5330DW utilizes a color LCD touchscreen for intuitive navigation. Users can easily access menus for settings, scan previews, and fax information. The display provides clear status updates, including ink levels and error messages. Touchscreen functionality allows for direct selection of options, simplifying operation.
Navigating involves tapping icons and selecting options. The interface is designed for ease of use, even for those unfamiliar with similar devices. Refer to the user manual for detailed explanations of each screen and its functions, ensuring optimal control over your printer.
Button Functions Explained
The Brother MFC-J5330DW features dedicated buttons for common tasks. The ‘Start’ button initiates printing, copying, and scanning. ‘Stop’ halts current operations, while ‘Back’ returns to the previous menu. Dedicated buttons for color and black & white printing offer quick selection.
The ‘Menu’ button accesses the printer’s settings. Refer to the user manual for a comprehensive list of button combinations and their corresponding functions, maximizing control and efficiency. Understanding each button streamlines operation and troubleshooting.
Status Indicators and Alerts
The Brother MFC-J5330DW utilizes various indicators to communicate its status. Solid lights generally signify normal operation, while blinking lights often indicate an error or require attention. The manual details specific light patterns for issues like paper jams, low ink, or connectivity problems.
Alerts appear on the LCD screen, providing detailed error messages and guidance. Regularly checking these indicators and alerts ensures prompt resolution of any issues, maintaining optimal printer performance and preventing disruptions.
Paper Handling
The MFC-J5330DW supports diverse paper types and sizes, detailed in the manual. Proper loading prevents jams, and the guide offers jam resolution steps.
Supported Paper Types and Sizes
The Brother MFC-J5330DW accommodates a wide range of paper, including plain paper, glossy photo paper, and envelopes. Supported sizes span from A3 to A4, Letter, and various smaller dimensions. The manual details specific weight recommendations for each type, ensuring optimal print quality and preventing paper feed issues.
It’s crucial to consult the guide for compatible paper weights to avoid jams or damage to the printer. Utilizing unsupported media may void the warranty, so adherence to the specified guidelines is highly recommended for consistent performance.
Loading Paper Correctly
Proper paper loading is vital for the Brother MFC-J5330DW’s reliable operation. The manual illustrates how to adjust the paper guides to securely hold the stack without bending or misaligning the sheets. Ensure the paper is neatly stacked and not overfilled, respecting the maximum capacity indicated on the tray.
Fan the paper before loading to prevent sticking, and always load with the correct side facing up, as detailed in the user guide, to achieve optimal print results and avoid feeding errors.
Resolving Paper Jams
Paper jams require careful attention. The MFC-J5330DW manual provides diagrams illustrating access points for removing jammed paper from various locations within the printer. Always power off the printer before attempting to clear a jam. Gently pull the paper in the direction of the normal paper path, avoiding torn pieces.
Inspect all areas to ensure no fragments remain, as these can cause further issues. Refer to the manual for specific instructions based on the jam location.
Printing Functions
The MFC-J5330DW supports basic printing, duplex options, and mobile device compatibility, all detailed within the user manual for optimal print quality and settings.
Basic Printing Operations
Initiating a print with the Brother MFC-J5330DW is straightforward. Ensure paper is loaded correctly, and the printer is connected to your device. From your computer or mobile device, select the print option and choose the MFC-J5330DW as your printer.
The manual details how to adjust print settings like paper size, type, and print quality via the printer’s control panel or your computer’s print dialog box. You can preview your document before printing to confirm settings. Refer to the manual for specific instructions on printing various document types.
Duplex Printing (Two-Sided)
The MFC-J5330DW supports automatic duplex printing, saving paper and reducing environmental impact. To enable this feature, access the print settings on your computer and select the “Two-Sided Printing” option. The manual provides detailed steps for configuring duplex printing, including options for long-edge or short-edge binding.
Ensure the paper type is suitable for duplex printing, as some heavier papers may cause issues. The printer automatically flips the paper to print on both sides, streamlining the process. Consult the manual for troubleshooting duplex printing errors.
Printing from Mobile Devices
The Brother MFC-J5330DW offers convenient mobile printing solutions. Utilize the “Brother iPrint&Scan” app, available for iOS and Android, to print directly from your smartphone or tablet. This app enables printing from various cloud services and local storage.
Alternatively, leverage Apple AirPrint for seamless printing from Apple devices without installing additional software. The printer manual details setup instructions for both methods, ensuring a straightforward mobile printing experience. Ensure your mobile device and printer are connected to the same network.
Scanning Functions
The MFC-J5330DW facilitates scanning to email, USB drives, and computers. The user manual provides detailed instructions for basic scanning operations and destination choices.
Basic Scanning Operations
To initiate a scan using the Brother MFC-J5330DW, first ensure your document is placed face down on the scanner glass or within the automatic document feeder. Access the ‘Scan’ function via the control panel or software.
Select your desired scan settings, including color mode, resolution (DPI), and file type (PDF, JPEG, etc.). Preview the scan to confirm settings before finalizing. Press the ‘Start Scan’ button to begin the process. Scanned files can then be saved to various destinations.
Scanning to Email
The MFC-J5330DW simplifies scanning directly to email. First, configure your email settings within the printer’s menu – requiring your email server details (SMTP server, port, authentication). Once configured, select ‘Scan to Email’ from the control panel.
Enter the recipient’s email address, a subject line, and any message text. Preview the scan, then initiate the scan process. The printer will automatically send the scanned document as an attachment.
Scanning to a USB Drive
The Brother MFC-J5330DW allows convenient scanning directly to a USB flash drive. Insert a formatted USB drive into the printer’s USB port. From the control panel, select ‘Scan’ and then ‘Scan to USB’. Choose your desired scan settings – resolution, file type (PDF, JPEG), and color mode.
Preview the scan, then press ‘Start’. The scanned document will be saved to the USB drive, ready for transfer to a computer.
Copying Functions
The MFC-J5330DW facilitates easy copying; adjust settings like reduction/enlargement and copy quantity via the control panel for efficient document duplication.
Making Basic Copies
To initiate a basic copy with your Brother MFC-J5330DW, ensure the document is placed face-down in the Automatic Document Feeder (ADF) or on the glass platen. Press the ‘Copy’ button on the control panel. The printer will automatically begin copying using default settings. You can adjust the number of copies using the numeric keypad before pressing the ‘Start’ button.
For single-sheet copies, simply place the original document and press ‘Copy’ then ‘Start’. The machine efficiently reproduces documents, offering a straightforward copying experience for everyday use.
Adjusting Copy Settings
To modify copy settings on the Brother MFC-J5330DW, press the ‘Copy’ button, then navigate to ‘Settings’ using the arrow keys on the control panel. Here, you can adjust options like copy density, reduction/enlargement ratios, and paper size; Select your desired settings and press ‘OK’ to confirm.
Further customization includes choosing between auto or manual mode for document size and selecting the copy quality – draft, normal, or fine – to optimize output based on your needs.
Reducing/Enlarging Copies
The MFC-J5330DW allows for easy reduction or enlargement of copies directly from the control panel. Access the ‘Copy’ function, then navigate to the ‘Size’ or ‘Reduction/Enlargement’ settings. You can select pre-defined percentages like 75% or 125%, or input a custom percentage for precise scaling.
Preview the changes on the LCD screen before finalizing. This feature is ideal for fitting documents onto smaller paper or magnifying details for better visibility during review.

Fax Functions (If Applicable)
The MFC-J5330DW supports sending and receiving faxes, with configuration options accessible through the printer’s menu for setup and efficient operation.
Sending a Fax
To send a fax using your Brother MFC-J5330DW, begin by ensuring the printer is connected to a functioning phone line. Utilize the control panel to enter the recipient’s fax number directly, or select a frequently used number from the speed dial.
You can initiate a fax transmission from your computer by printing the document to the Brother MFC-J5330DW fax driver. Confirm the document is loaded correctly, and then press the start button to begin sending. The printer will display the progress and confirm successful transmission.
Receiving a Fax
The Brother MFC-J5330DW can receive faxes automatically when connected to a phone line, even while the printer is performing other tasks. Ensure the fax receive mode is enabled within the printer’s settings via the control panel. You can choose to receive all faxes or only those from specific numbers.
Received faxes are stored in the printer’s memory or can be printed immediately, depending on your configuration. Access received faxes through the printer’s menu to view, print, or delete them as needed.
Fax Setup and Configuration
Configuring the Brother MFC-J5330DW for faxing requires connecting a telephone line to the printer. Access the fax settings through the control panel’s menu, navigating to “Fax” then “Fax Setup.” Here, you’ll configure the line type, area code, and sender information.
Ensure proper dialing rules are set for accurate fax transmission. You can also adjust resolution and error correction settings for optimal fax quality. Test the configuration by sending a test fax to verify functionality.
Maintenance and Troubleshooting
Regular maintenance, like print head cleaning and ink cartridge replacement, ensures optimal performance. The manual provides solutions for common errors and issues.
Cleaning the Print Head
Maintaining a clean print head is crucial for optimal print quality with your Brother MFC-J5330DW. The user manual details a print head cleaning process, accessible directly through the printer’s control panel. This function utilizes the printer’s internal cleaning system to dissolve and remove built-up ink.
Multiple cleaning cycles may be necessary for stubborn clogs, but avoid excessive use to conserve ink. The manual also provides guidance on performing a more thorough cleaning if standard procedures are insufficient, potentially involving manual intervention – always following the outlined safety precautions.
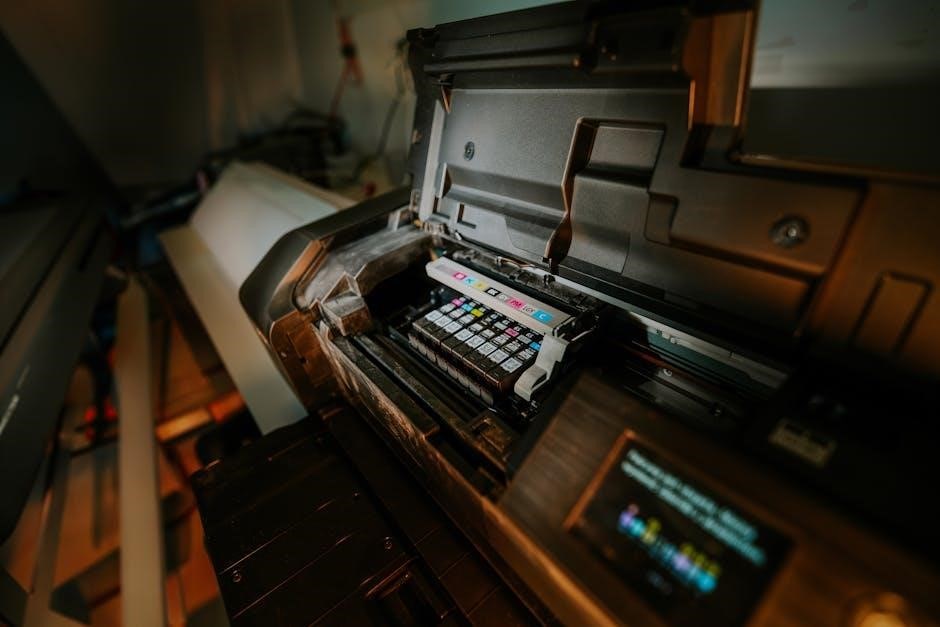
Replacing Ink Cartridges
The Brother MFC-J5330DW manual provides clear instructions for replacing ink cartridges. Access the cartridge bay via the printer’s control panel, following the on-screen prompts. Gently remove the empty cartridge and install the new one, ensuring a secure connection.
The printer automatically recognizes new cartridges. Always use genuine Brother cartridges for optimal performance and to avoid potential damage. The manual details cartridge color codes and proper disposal methods, promoting responsible environmental practices.
Troubleshooting Common Errors
The Brother MFC-J5330DW manual offers solutions for frequent issues. Paper jams are addressed with detailed diagrams showing access points and removal techniques. Error codes are explained, guiding users through potential causes like low ink or connectivity problems.
The manual suggests cleaning the print head for poor print quality. For network errors, it details connection verification steps; Referencing the manual’s troubleshooting section can often resolve issues quickly, minimizing downtime.
Advanced Settings
The MFC-J5330DW manual details network configuration, security protocols, and report printing options for customized functionality and enhanced control over the printer.
Network Configuration
The Brother MFC-J5330DW manual provides detailed instructions for connecting your printer to a network, both wired and wireless. It guides users through configuring TCP/IP settings, including IP addresses, subnet masks, and default gateways.
Wireless setup involves selecting your network name (SSID) and entering the correct password. The manual also explains how to confirm a successful connection and troubleshoot common network issues, ensuring seamless integration with your existing infrastructure. For wireless users, specific solutions are referenced within the documentation.
Security Settings
The Brother MFC-J5330DW manual details security features to protect your printer and network. It explains how to enable secure print, requiring a PIN for job release, preventing unauthorized access to sensitive documents.
The manual also covers configuring network security protocols, like WPA2, and restricting access based on user permissions. Further, it outlines how to manage the printer’s internal memory and logs to maintain data integrity and overall system security, safeguarding your information.
Report Printing
The Brother MFC-J5330DW manual explains how to generate various reports directly from the printer. These reports provide valuable insights into printer usage, network configuration, and error logs. You can print a network configuration page for troubleshooting connectivity issues, or a usage report to monitor print volume.
The manual details accessing these options through the printer’s control panel, allowing for easy monitoring and management of printer performance and network settings for optimal efficiency.

Software Utilities
Brother’s iPrint&Scan, ControlCenter, and MyImageLink enhance the MFC-J5330DW experience, offering mobile printing and workflow solutions as detailed in the manual.
Brother iPrint&Scan
Brother iPrint&Scan is a powerful mobile app designed for both PC and Mac users, providing seamless access to the MFC-J5330DW’s scanning and workflow functionalities. The user manual details how to download and install this utility for your specific operating system – Windows or Macintosh.
It allows for convenient printing and scanning directly from your smartphone or tablet, enhancing productivity on the go. Detailed instructions within the manual guide users through connecting to the printer wirelessly and utilizing the app’s full range of features.
ControlCenter
Brother ControlCenter is a software package included with the MFC-J5330DW, offering a centralized hub for managing various printer functions. The user manual provides guidance on installing and utilizing ControlCenter’s features, which include powerful scanning capabilities and document management tools.
It simplifies tasks like scanning to file, email, or image, and allows for customized settings to optimize workflow. Refer to the manual for detailed instructions on accessing and configuring ControlCenter for enhanced printer control.
MyImageLink
Brother MyImageLink is a cloud-based service designed to enhance document workflows with the MFC-J5330DW. The printer’s manual details how to connect and utilize MyImageLink for secure document storage and access from various devices.
This allows for streamlined collaboration and remote access to scanned files. The manual provides step-by-step instructions for setting up MyImageLink and leveraging its features for improved document management and accessibility.

Open Source Software Information
The MFC-J5330DW incorporates open-source software; the printer manual provides details regarding its usage, licensing, and access to downloadable PDF documentation.
Details on Included Open Source Software
Brother’s MFC-J5330DW utilizes various open-source software components to enhance functionality and provide a robust printing experience. The official user manual details these inclusions, offering transparency regarding the technologies integrated within the device.
These components contribute to features like network connectivity, image processing, and document handling. A downloadable PDF document, accessible through Brother’s support website, provides a comprehensive list and associated licensing information for each open-source package used. This ensures compliance and allows users to understand the software foundation of their printer.
Licensing Information
The Brother MFC-J5330DW incorporates open-source software under various licenses, including GPL, LGPL, and BSD. Brother provides detailed licensing information for each component within a downloadable PDF document, accessible via their official support website.
This documentation outlines the terms and conditions governing the use, modification, and distribution of these open-source elements. Users can review these licenses to ensure compliance and understand their rights regarding the software integrated into the printer’s functionality, promoting transparency and legal adherence.
Genuine Brother Supplies
Brother recommends using only genuine Brother ink cartridges and drum units for optimal performance and to maintain the printer’s warranty validity.
Recommended Ink Cartridges
For the Brother MFC-J5330DW, utilizing genuine Brother ink ensures consistently high-quality prints and protects the longevity of your printer. Recommended cartridges include the LC3229 series in black, cyan, magenta, and yellow. These individual ink tanks allow for replacement only when needed, reducing waste and cost.
Brother also offers high-yield options (LC3229XL) for increased page output, ideal for frequent printing. Always verify compatibility with your specific model to guarantee optimal performance and avoid potential issues. Using non-genuine inks may void your warranty.
Drum Unit Replacement
The Brother MFC-J5330DW utilizes a drum unit alongside ink cartridges. Brother strongly recommends using genuine Brother drum units for optimal print quality and to prevent printer damage. The drum unit has a lifespan dependent on print volume, typically lasting several ink cartridge sets.
The manual details the replacement process, emphasizing careful handling. A warning message will appear when the drum unit nears its end-of-life. Replacing it promptly ensures consistent printing and avoids potential print quality issues.