how to sew curtains – step by step pdf
How to Sew Curtains: A Step-by-Step Guide
Creating custom curtains allows for personalized window treatments․ This guide‚ based on resources like Moda Fabrics’ PDF‚ details the process of crafting curtains tailored to your space․
Begin by determining the desired height and width‚ considering fullness and hemming allowances for a professional finish․
Understanding Fabric Choices
Selecting the right fabric is crucial for both the aesthetic and functionality of your curtains․ As highlighted in resources like the Moda Fabrics guide‚ various materials offer different qualities․ For standard curtains‚ consider soft and silky 108” sateen quilt backs‚ providing a luxurious drape and ample width to minimize seams․

Alternatively‚ 44″ wide Ruby Star Cotton prints offer a vibrant and diverse range of patterns․ The choice depends on the desired look and feel – sateen for elegance‚ cotton for a more casual style․
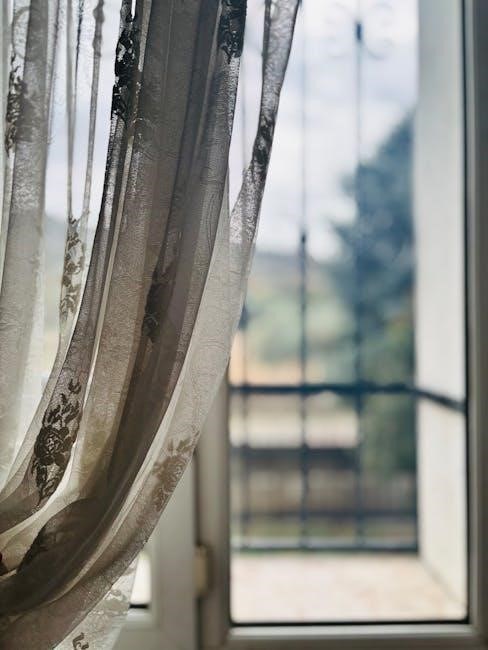
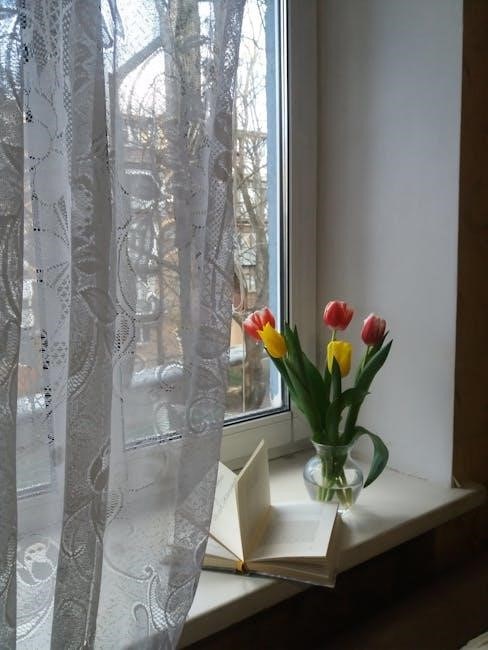
Weight and opacity are also key considerations․ Lightweight fabrics like voile or sheer linen allow for ample light filtration‚ creating an airy ambiance․ Heavier fabrics‚ such as velvet or blackout lining‚ provide greater privacy and light control․

For unique designs‚ explore border prints like Melody Miller’s Rise collection‚ offering a sweet floral aesthetic․ Remember to factor in the fabric’s width when calculating yardage‚ as wider fabrics require less seaming․
Ultimately‚ the best fabric choice aligns with your personal style‚ the room’s décor‚ and the level of light and privacy desired․
Measuring Your Windows for Curtains
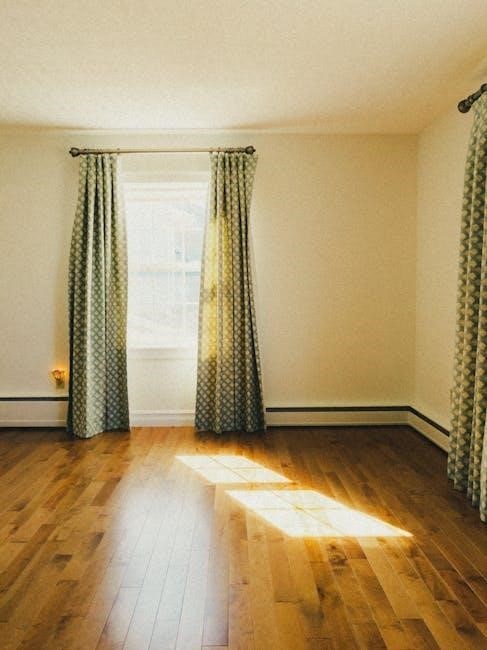
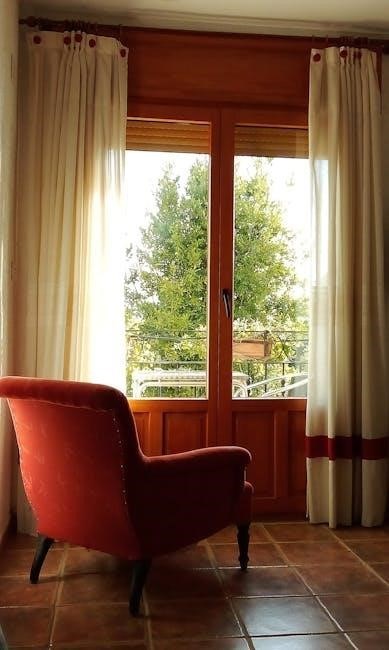
Accurate measurements are the foundation of well-fitting curtains․ Begin by determining the desired finished height – not the window’s height‚ but the overall length you envision․ A common practice‚ as suggested by Moda Fabrics’ guide‚ is to hang curtains near the top of the wall to visually enlarge the window and room․
For full-length curtains‚ aim for a length approximately ½” above the floor․ This prevents dragging and maintains a clean look․ Next‚ measure the width․ Don’t just measure the window itself; account for any desired overhang․
Curtains typically extend beyond the window frame to create fullness and block more light․ A 10” overhang on each side is a good starting point‚ but adjust based on your preference․
Measure the total width the curtains will cover‚ including the overhang․ Remember to consider multiple curtains if you want to cover a wider space․ Precise measurements ensure sufficient fabric for a pleasingly full and properly sized curtain․
Double-check all measurements before proceeding to the fabric calculation stage to avoid costly errors․
Calculating Fabric Yardage
Determining the correct fabric yardage is crucial to avoid shortages or excessive waste․ As outlined in the Moda Fabrics guide‚ curtains should ideally be 1․5 to 2 times the width of the area they will cover to achieve a beautiful fullness when hung․
To calculate the fabric needed for each curtain‚ multiply the desired coverage width by either 1․5 or 2‚ depending on the level of fullness you prefer․ Then‚ add 2” to this figure to account for side hem allowances․
If you’re using multiple curtains to cover a larger space‚ repeat this calculation for each panel․ For example‚ if covering a 40” window with a 10” overhang on each side (totaling 60” coverage) and using two curtains‚ each curtain requires 30” of coverage․
Don’t forget to add 7” to the finished height for top and bottom hem allowances‚ as recommended․ This ensures sufficient fabric for a professional-looking finish․ Accurate calculations save time and money‚ ensuring a successful sewing project․
Always round up your yardage to the nearest ¼ yard to account for potential shrinkage or pattern matching․
Preparing the Fabric
Proper fabric preparation is essential for achieving professional-looking curtains and preventing issues during sewing․ Before cutting‚ it’s vital to address potential shrinkage and wrinkles․ This step ensures the finished curtains will hang correctly and maintain their shape over time․
Begin by pre-washing your fabric‚ especially if it’s 100% cotton or a blend prone to shrinking․ Use the same water temperature and drying method you plan to use for future cleaning․ This prevents unexpected shrinkage after the curtains are hung․
Once washed and dried‚ iron the fabric thoroughly to remove any remaining wrinkles․ A smooth surface is crucial for accurate cutting and sewing․ Use an appropriate iron setting based on the fabric type‚ avoiding excessive heat that could damage the material;
Inspect the fabric for any flaws or imperfections․ Address these before cutting‚ either by working around them or carefully trimming them away․ A little extra attention at this stage can save frustration later․
Finally‚ ensure your cutting surface is clean and flat to provide a stable base for precise measurements and cuts․
Cutting the Fabric
Accurate fabric cutting is paramount for well-fitting curtains․ Following the calculations from the previous steps‚ carefully transfer your measurements onto the prepared fabric; Utilize a rotary cutter‚ fabric scissors‚ or a sharp utility knife for clean‚ precise cuts․
Remember‚ the Moda Fabrics guide suggests adding 7 inches to your desired finished curtain height for hemming allowances․ For width‚ multiply the space you want to cover by 1․5 or 2 for fullness‚ then add 2 inches for side hems․
Use a quilting ruler and fabric marker to draw straight cutting lines․ Double-check your measurements before cutting to avoid costly mistakes․ If using a rotary cutter‚ employ a self-healing cutting mat to protect your work surface․
When cutting multiple panels‚ ensure they are all the same size․ Slight variations can affect the overall appearance of the finished curtains․ Consider cutting all pieces at once‚ layering the fabric for efficiency․
Finally‚ label each fabric piece clearly to avoid confusion during the sewing process․ This is especially helpful when working with multiple panels or different fabric types․
Hemming the Sides of the Curtains
Hemming the sides prevents fraying and provides a clean‚ finished edge to your curtain panels․ As per the Moda Fabrics guide‚ a 2-inch allowance was included in the initial fabric width calculation for these hems․ Begin by folding the fabric edge over ¼ inch towards the wrong side‚ then press with an iron to create a crisp crease․
Next‚ fold the edge over again‚ this time 1 ¼ inches‚ encasing the raw edge within the fold․ Press firmly once more․ This double-fold hem creates a durable and professional-looking finish․
Pin the hem in place along the entire length of the curtain side․ Using a sewing machine with a straight stitch‚ carefully sew along the folded edge‚ close to the inner fold․ Backstitch at the beginning and end of each seam to secure the stitches․
Repeat this process on all four sides of each curtain panel․ Ensure the hems are consistent in width for a uniform appearance․ A walking foot on your sewing machine can be helpful when sewing through multiple layers of fabric․
Finally‚ press the finished hems again to flatten the seams and create a polished look․ This step is crucial for achieving a professional result․
Creating the Bottom Hem
Creating the bottom hem is a crucial step in achieving a professional finish for your curtains․ The Moda Fabrics guide recommends a total of 7 inches of hemming allowance when initially cutting the fabric‚ specifically to accommodate this bottom hem․ Begin by folding the bottom edge of the curtain up by ½ inch towards the wrong side of the fabric and press with an iron to create a defined crease․
Next‚ fold the fabric up again‚ this time by 3 ½ inches‚ encasing the raw edge within the fold․ Press firmly to establish a sharp‚ clean line․ This creates a substantial hem that provides weight and prevents the curtain from swaying excessively․
Pin the hem securely along the entire width of the curtain․ Using a sewing machine and a straight stitch‚ sew close to the inner folded edge․ Backstitch at both ends of the seam to reinforce the stitching and prevent unraveling․
For a more refined look‚ consider a blind hem stitch‚ which creates an almost invisible hem on the right side of the curtain․ Finally‚ press the completed bottom hem thoroughly to ensure a flat‚ polished appearance․
Adding Curtain Tape
Curtain tape is essential for creating a professional hanging system‚ particularly for rod pocket or pleated curtains․ It provides loops or channels for the curtain rod to pass through‚ distributing weight evenly and preventing sagging․ Select a curtain tape appropriate for your desired style – options include pleating tape for formal gathers or heading tape for a simpler finish․

Begin by measuring the width of your curtain panel․ Cut a length of curtain tape slightly longer than the width‚ allowing for overlap at the ends․ Pin the curtain tape along the top edge of the curtain‚ on the wrong side of the fabric‚ aligning the tape’s edge with the raw edge of the curtain․
Using a sewing machine and a straight stitch‚ sew the curtain tape securely to the curtain․ Sew along both edges of the tape‚ ensuring a strong and durable attachment․ Avoid sewing through the drawstrings or loops within the tape․
Once sewn‚ gently pull the drawstrings to create the desired gathers or pleats․ Adjust the fullness to your preference‚ and tie off the drawstrings securely at both ends to maintain the shape․
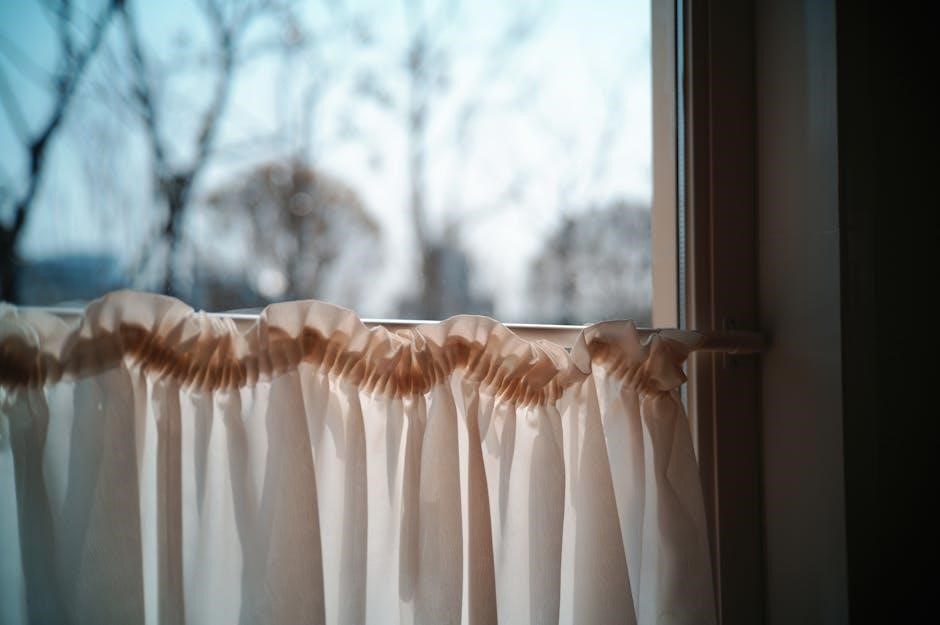
Creating the Top Hem for Rod Pocket
Preparing the top hem is crucial for creating a neat and functional rod pocket․ This hem will encase the curtain rod‚ allowing the curtains to hang smoothly and securely․ Begin by folding the top edge of the curtain down by 1․5 inches towards the wrong side of the fabric․ This initial fold creates the foundation for the pocket․
Next‚ fold the fabric down again by another 1․5 inches‚ encasing the raw edge within the fold․ This double fold creates a clean‚ finished edge and provides sufficient depth for the curtain rod․ Pin the folded hem securely in place along the entire width of the curtain‚ ensuring even spacing and a consistent width․
Using a sewing machine and a straight stitch‚ sew along the bottom edge of the folded hem‚ close to the inner fold․ Backstitch at the beginning and end of the seam to secure the stitches and prevent unraveling․ Ensure your stitching is straight and even for a professional finish․
Carefully turn the curtain right side up and test the rod pocket by sliding the curtain rod through it․ Adjust the hem if necessary to ensure a smooth and easy fit․
Sewing the Rod Pocket
Securing the rod pocket involves precise stitching to create a durable channel for the curtain rod․ After creating the top hem‚ carefully pin it in place‚ ensuring the folds are neat and even along the entire width of the curtain panel․ This step is vital for a professional-looking finish․
Using a sewing machine‚ select a straight stitch and begin sewing along the bottom edge of the folded hem․ Maintain a consistent seam allowance‚ typically ¼ inch‚ to ensure a clean and uniform appearance․ Backstitch at the beginning and end of the seam to reinforce the stitching and prevent unraveling‚ especially with frequent use․
As you sew‚ periodically stop and adjust the fabric to prevent puckering or unevenness․ A walking foot can be particularly helpful for handling multiple layers of fabric․ Once the entire hem is sewn‚ remove the pins and inspect the stitching for any imperfections․
Reinforce the corners of the rod pocket with additional stitching‚ as these areas are prone to stress․ Finally‚ gently turn the curtain right side out and test the rod pocket with your curtain rod to confirm a smooth and secure fit․
Ironing and Pressing the Curtains
Ironing and pressing are crucial final steps‚ transforming your sewn fabric into polished‚ professional-looking curtains․ Begin by carefully removing any remaining pins or threads from the curtain panels․ A clean‚ wrinkle-free surface is essential for achieving the best results․
Start by pressing the seams flat‚ using a medium heat setting appropriate for your fabric type․ Avoid excessive heat‚ which could damage or distort the material․ Press from the wrong side of the fabric first‚ then gently flip and press from the right side for a crisp finish․
Pay particular attention to the hems – both the side and bottom hems‚ as well as the rod pocket․ Ensure these areas are neatly pressed and lie flat․ A pressing cloth can protect delicate fabrics from direct heat․
Steam can be used cautiously to remove stubborn wrinkles‚ but avoid over-saturating the fabric․ Once the entire curtain is pressed‚ hang it immediately to prevent new wrinkles from forming․ This final step elevates the overall appearance and ensures a beautifully finished product․
Hanging the Curtains
Hanging your newly sewn curtains is the exciting culmination of your efforts! Before you begin‚ ensure your curtain rod is securely installed and level․ The height of the rod significantly impacts the perceived size of your window and room – hanging it near the top of the wall creates a more spacious feel‚ as suggested by Moda Fabrics’ guide․
Carefully thread the curtains onto the rod‚ starting with one end and working your way across․ If using a rod pocket‚ gently ease the fabric onto the rod․ For curtains with rings or grommets‚ attach them securely before hanging․
Step back and assess the drape․ Adjust the curtains as needed to ensure even distribution and a pleasing fullness․ Remember‚ a curtain should generally be 1․5 to 2 times the width of the window for optimal fullness․
Consider the desired length; curtains should ideally end about ½” above the floor․ Finally‚ step back and admire your handiwork – beautifully hung curtains can dramatically transform a room!
Troubleshooting Common Sewing Issues
Sewing curtains‚ while generally straightforward‚ can present a few common challenges․ Uneven hems are easily rectified with careful ironing and re-measuring before cutting․ If your fabric puckers‚ reduce the presser foot pressure on your sewing machine and use a longer stitch length․
Dealing with fabric slippage? Use a walking foot‚ which feeds both layers of fabric evenly․ For corners that are difficult to turn neatly‚ clip the seam allowance close to the corner before turning – be careful not to cut through the stitching!
If your rod pocket is too tight‚ carefully ease the fabric onto the rod‚ or consider slightly widening the pocket․ Always test your stitch settings on a scrap of fabric before sewing the actual curtains․
Remember to press seams open as you go; this creates a cleaner‚ more professional finish․ Don’t be afraid to unpick and redo sections if you’re not satisfied – patience is key to achieving beautiful results!
Different Curtain Styles (Rod Pocket‚ Grommet‚ Tab Top)
Curtain styles significantly impact the overall look and functionality of your window treatment․ Rod pocket curtains‚ a classic choice‚ are created by folding over the top edge to form a channel for the rod – a simple method ideal for lightweight fabrics․
Grommet curtains offer a more contemporary aesthetic․ This style involves reinforcing holes with metal grommets‚ allowing the curtains to hang with elegant‚ uniform folds․ It requires a grommet kit and a bit more precision during installation․
Tab top curtains present a relaxed‚ casual vibe․ Fabric loops (tabs) are sewn onto the top edge‚ through which the rod passes․ This style is best suited for lighter-weight fabrics and creates a softer drape․
Consider the weight and drape of your chosen fabric when selecting a style․ Heavier fabrics work well with grommets‚ while lighter fabrics are perfect for rod pockets or tab tops․ Each style offers a unique visual appeal and level of formality․
Adjusting Curtain Length
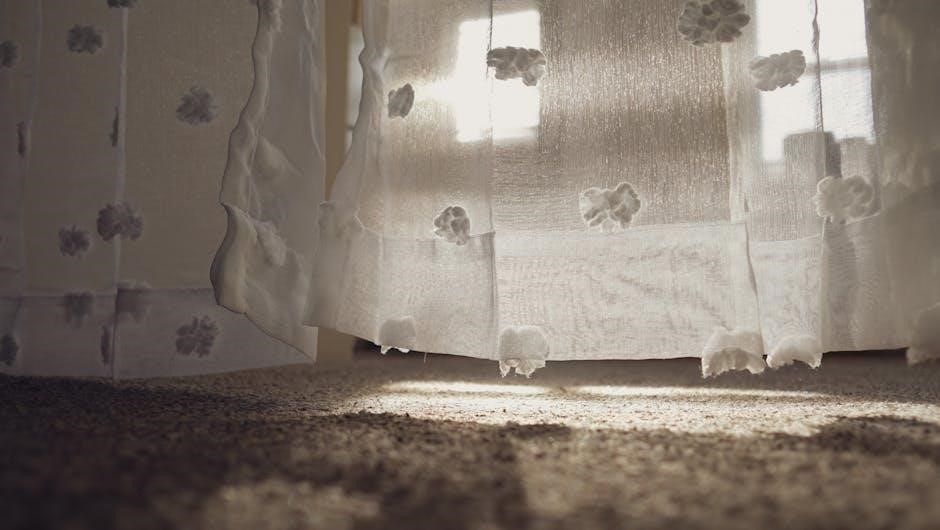
Achieving the perfect curtain length is crucial for a polished look․ Generally‚ curtains should either “kiss” the floor‚ gently touching it‚ or “float” slightly above it – approximately ½ inch․ For a more modern aesthetic‚ a slight break‚ where the curtain pools on the floor‚ can be effective‚ but requires extra fabric․
Before final hemming‚ always measure the distance from the rod to the desired endpoint․ Account for the top hem and rod pocket (if applicable) when calculating the necessary adjustments․ It’s wise to err on the side of caution and leave a little extra length initially․

If your curtains are too long‚ simply fold and press the excess fabric before hemming․ If they are too short‚ adding a contrasting fabric band at the bottom can be a creative solution․ Precise measuring and careful hemming are key to a professional finish․
Remember that the ideal length depends on your personal preference and the overall style of the room․ Consider the floor type – carpets often allow for a slightly longer length than hard floors․
Resources for Printable Patterns & Guides (PDFs)
Embarking on a curtain-sewing project often benefits from utilizing readily available resources․ Moda Fabrics provides a comprehensive project sheet in PDF format – “fp-curtain-making-guide․pdf” – accessible at their website․ This guide focuses on customizing curtains to fit individual spaces‚ offering valuable insights into fabric selection and measurement techniques․
Beyond Moda Fabrics‚ numerous online platforms host free and paid curtain-sewing patterns and guides․ Websites like Pinterest and Etsy are excellent starting points for discovering diverse styles and skill levels․ Search terms such as “free curtain patterns PDF” or “curtain sewing tutorial PDF” will yield a wealth of options․
These downloadable resources typically include detailed instructions‚ cutting layouts‚ and sometimes even printable pattern pieces․ They can be particularly helpful for beginners‚ providing a structured approach to the sewing process․ Always check the skill level indicated before starting a project․
Remember to download and save these PDFs to your device for easy access throughout your curtain-making journey․ Utilizing these resources can streamline the process and ensure a successful outcome․