
status plug in timer instructions
This guide provides comprehensive instructions for setting up and using Status Plug-In Timers, ensuring efficient and secure automation of household appliances. Discover how to optimize your daily routines with ease and reliability.
Overview of the Status Plug-In Timer
The Status Plug-In Timer is a versatile device designed to automate the operation of household appliances, ensuring convenience and energy efficiency. It allows users to schedule on/off times for devices like lights, HVAC systems, and electronics. With features like programmable settings, manual override, and compatibility with various appliances, it enhances home automation. The timer is easy to install and operate, offering a user-friendly interface for setting schedules. Its compact design and reliable performance make it ideal for everyday use, providing peace of mind and reducing energy waste. Perfect for managing lights, security systems, and more.
Importance of Proper Setup and Usage
Proper setup and usage of the Status Plug-In Timer are crucial for ensuring safe, efficient, and reliable operation. Improper installation or handling can lead to electrical hazards or malfunction. Always ensure the timer is plugged directly into a wall outlet and appliances are connected securely to avoid loose connections. Regular maintenance, such as cleaning the timer when unplugged, prevents dust buildup and ensures accuracy. Following the manufacturer’s guidelines helps extend the timer’s lifespan and optimizes its performance. Correct usage also reduces energy waste and enhances the overall functionality of connected appliances, making it essential for household automation.

Understanding the Components of the Timer
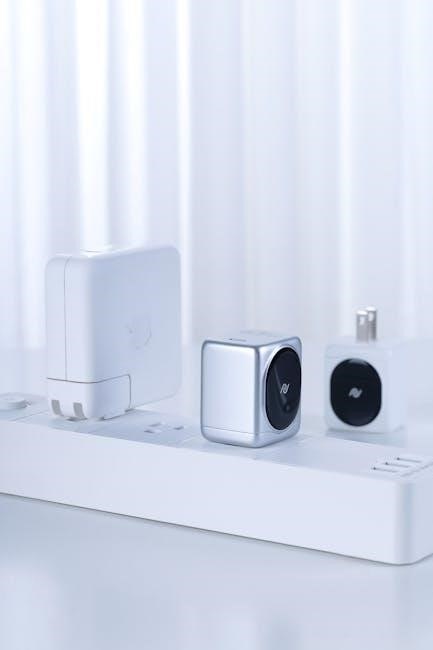
Understanding the components of the Status Plug-In Timer is essential for proper setup and usage. Key elements include the outlet, control dial, and build quality.
Key Features of the Status Plug-In Timer
The Status Plug-In Timer offers a range of innovative features designed for convenience and reliability. It includes a user-friendly interface with a clear LCD display, multiple programmable settings, and an override switch for manual control. The timer supports up to 10 different programs and 16 combinations, allowing for flexible scheduling. Additional features like summertime mode and random operation enhance functionality. Electrical safety is prioritized with built-in protections, ensuring secure usage. These features make it an ideal solution for automating household appliances efficiently and safely.
Identifying the LCD Display and Control Buttons
The Status Plug-In Timer features a clear LCD display that shows the current time and programmed settings. The display is easy to read, ensuring quick access to information. Below the LCD, you’ll find a set of control buttons, including UP and DOWN arrows for adjusting time and settings. These buttons allow you to navigate through options and set your desired programs. Additionally, the timer includes an override switch for manual operation, giving you full control over connected appliances. Familiarizing yourself with these components ensures seamless operation and customization of your timer. Always unplug the timer before cleaning to maintain functionality and safety.

Installation and Initial Setup
Plugging the Timer into the Wall Outlet
Start by selecting a suitable wall outlet for your Status Plug-In Timer. Ensure the outlet is compatible with the timer’s voltage and wattage requirements. Plug the timer firmly into the outlet, making sure it is fully inserted to establish a secure connection. Avoid using extension cords or overloaded circuits to prevent electrical hazards. Once plugged in, the timer is ready to power your connected devices. Always verify that the outlet is functioning properly before use. This step ensures reliable operation and maintains safety standards for your automated setup.
Connecting Appliances to the Timer
After plugging in the timer, connect your appliance by inserting its plug into the timer’s outlet. Ensure the plug is fully inserted to establish a secure connection. This ensures reliable operation and prevents electrical issues. Always check the appliance’s plug for damage before connecting it to the timer. Avoid overloading the timer by connecting devices with combined wattage exceeding its capacity. For example, lamps, coffee makers, or fans can be easily managed. This setup allows you to control your appliances automatically, enhancing convenience and energy efficiency while maintaining safety standards.

Setting the Current Time and Programming the Timer
Press the UP or DOWN button to set the current time on the LCD display. Program the timer by selecting specific times for your appliances to turn on or off, ensuring automated operation.
Configuring the Current Time on the Timer
To set the current time on your Status Plug-In Timer, press the UP or DOWN button until the LCD display shows the CLOCK mode. Use the buttons to adjust the time accurately. Once set, confirm the time by pressing the button again. Ensure the timer is plugged into a wall outlet before configuring. This step is essential for programming automated schedules. Always double-check the time to avoid errors in appliance operation. Proper time configuration ensures smooth and reliable performance of your timer. Follow these steps carefully for accurate time setup and seamless automation.
Programming the Timer for Automated Operation
After setting the current time, press the MODE button to enter programming. Use the UP/DOWN buttons to select the desired on/off times. For mechanical timers, turn the dial clockwise to align the pointer with the current time. Push in the pins for the times you want your appliance to turn on. For digital models, navigate through the menu to set specific schedules. Once programmed, press the MODE button to save your settings. Ensure all pins or digital entries are confirmed to activate automated operation. This feature allows you to manage your appliances efficiently, saving time and energy while maintaining convenience.

Different Types of Status Plug-In Timers
Status Plug-In Timers are available in mechanical, digital, and smart variants, each offering unique features to suit specific needs. Mechanical timers use dials and pins, while digital and smart timers provide programmable schedules and remote control capabilities, enhancing convenience and efficiency for home automation.
Mechanical vs. Digital Timers
Mechanical timers operate using a dial and pins, offering simplicity for basic scheduling needs. They are easy to use, with visible markers for setting on/off times. Digital timers, however, feature LCD displays and button controls for precise programming. They often include advanced functions like daily or weekly schedules, making them ideal for complex automation. Mechanical timers are cost-effective and reliable for straightforward tasks, while digital timers provide greater flexibility and customization. Both types ensure efficient control of appliances, with digital timers offering enhanced convenience for modern users seeking detailed programming options.
Smart Plug-In Timer Options
Smart Plug-In Timers offer advanced automation with features like 7-day programming, up to 10 programs, and 16 combinations. They include handy options such as summertime and random modes for enhanced flexibility. These timers often support app control, allowing users to manage schedules remotely via smartphones. Voice command compatibility with smart home systems adds convenience. Energy monitoring features help track appliance usage, optimizing power consumption. Smart timers are ideal for modern households seeking precise, customizable automation. They provide seamless integration with smart devices, making them a superior choice for users looking to enhance efficiency and convenience in their daily routines.

Safety Precautions and Electrical Tips
Adhering to safety guidelines is crucial when using Status Plug-In Timers. Always ensure plugs are fully inserted and clean the timer without power. Follow electrical safety tips to prevent hazards.
General Safety Guidelines for Using Plug-In Timers
When using Status Plug-In Timers, always ensure the plug is fully inserted into the outlet to avoid electrical hazards. Keep the timer away from water and moisture to prevent damage or shocks. Avoid overloading the timer with multiple high-power appliances, as this can cause overheating. Regularly inspect the timer and cords for signs of wear or damage. Never use a damaged timer, as it may pose a fire risk. Additionally, keep timers out of reach of children and pets to prevent accidental tampering. Always follow the manufacturer’s guidelines for safe operation and maintenance.
Electrical Safety Tips for Appliance Usage
Ensure the plug of any appliance is fully inserted into the timer outlet to prevent electrical hazards. Avoid overloading the timer with multiple high-power devices, as this can cause overheating or fires. Use the timer only with appliances compatible with its power rating. Keep the timer away from water and moisture to avoid electrical shocks. Regularly inspect cords and plugs for damage or wear, and replace them if necessary. Never use a damaged timer, as it may pose serious safety risks. Always follow the manufacturer’s guidelines for safe operation and maintenance of your Status Plug-In Timer.

Operating Modes and Scheduling
Understand the operating modes (ON, AUTO, OFF) and scheduling options for efficient appliance control. Set daily or weekly schedules with multiple programs for precise automation and energy management.
Understanding On, Auto, and Off Modes
The Status Plug-In Timer offers three primary operating modes: ON, AUTO, and OFF. In ON mode, the timer keeps the connected appliance constantly powered. AUTO mode allows you to set specific schedules, enabling automated control of your devices. OFF mode disconnects power entirely. Switching between modes is straightforward, typically done via a manual override switch or digital interface. Understanding these modes ensures precise control over your appliances, whether you need constant power, scheduled automation, or complete disconnection. This feature enhances flexibility and energy efficiency in daily operations.
Setting Up Daily and Weekly Schedules
Setting daily and weekly schedules on your Status Plug-In Timer is straightforward and efficient. Begin by pressing the UP or DOWN buttons to set the current time on the LCD display. For daily schedules, turn the dial clockwise to align the triangular pointer with the desired activation time. For weekly schedules, use the 7-day timer, which offers up to 10 programs and 16 combinations, allowing you to customize on/off times for different days. Once programmed, the timer automatically follows the set schedule, ensuring your appliances operate seamlessly. This feature is ideal for managing lights, electronics, and other devices with precision and energy efficiency.
Troubleshooting Common Issues
Identify and resolve timer malfunctions by checking connections, ensuring the plug is fully inserted, and verifying power supply. If issues persist, reset the timer to factory settings or consult the manual for additional guidance.
Identifying and Resolving Timer Malfunctions
Common issues with Status Plug-In Timers include the timer not turning on or failing to trigger programmed settings; First, check if the plug is fully inserted into the outlet. Ensure the appliance is properly connected to the timer’s outlet. If the LCD display is unresponsive, try resetting the timer by unplugging it for 10 seconds. For programming errors, verify that the current time is set correctly and saved. If malfunctions persist, consult the user manual or contact customer support for further assistance. Regular maintenance, such as cleaning the timer, can also prevent operational issues.
Resetting the Timer to Factory Settings
To reset your Status Plug-In Timer to factory settings, start by ensuring the timer is powered on. Turn the dial to the current time and press and hold the reset button until the LCD display clears. Unplug the timer from the outlet, wait 10 seconds, and plug it back in. This process erases all programmed settings, returning the timer to its default state. After resetting, you will need to reconfigure the current time and any automated schedules. If issues persist, refer to the user manual for additional troubleshooting steps or contact customer support for assistance.

Maintenance and Care Tips
Regularly clean the timer with a soft cloth and avoid harsh chemicals. Ensure it is unplugged before cleaning to maintain functionality and safety.
Cleaning and Maintaining the Timer
Regular cleaning ensures optimal performance and longevity of the Status Plug-In Timer. Always unplug the timer before cleaning to avoid electrical hazards. Use a soft, dry cloth to wipe the LCD display and exterior surfaces, removing dust and dirt. Avoid harsh chemicals or abrasive materials that may damage the finish or harm electrical components. For stubborn stains, lightly dampen the cloth with water, but ensure no moisture enters the timer. Check for dust buildup in outlets and buttons, as this can interfere with functionality. Proper maintenance ensures reliable operation and extends the timer’s lifespan.
Replacing or Upgrading the Timer
If your Status Plug-In Timer shows signs of wear or malfunction, consider replacing or upgrading it. Before replacement, unplug the timer and disconnect all appliances. Remove any programmed settings to prevent data loss. When upgrading, choose a timer compatible with your appliances and electrical system. Smart timers offer advanced features like app control and energy monitoring. Dispose of the old timer responsibly, following local regulations. Upgrading ensures you benefit from the latest technology and improved performance, enhancing your home automation experience.
This guide has provided comprehensive instructions for setting up and using Status Plug-In Timers, ensuring efficient and secure automation of household appliances effectively.
Final Tips for Effective Timer Usage
For optimal performance, regularly inspect the timer’s plug and outlet connections. Clean the device periodically to ensure proper functionality. Always follow the manufacturer’s guidelines for resetting or troubleshooting. Utilize smart features, such as programmable schedules, to maximize efficiency and convenience. Remember to test your settings before relying on them fully. By adhering to these tips, you can enjoy enhanced control over your appliances, reducing energy waste and improving your daily routines. Proper maintenance ensures long-term reliability and safety for your Status Plug-In Timer.